The brilliant thing about making your own sanding sticks is that you can make them exactly the size, shape, and sandpaper grit that you want and need. The other brilliant thing is that it’s super satisfyingly easy to do!
- 1 sheet waterproof sandpaper (220, 320, 400, 600, etc.)
- 1 piece of wood about 12″ long (round dowel, quarter round, rec. door stop, lath, etc.)
- 5 small carpet tacks (#3 is a good size)
Tools:
- Permanent marker
- Scribe, ballpoint
- Hammer
- Needle-nose pliers (optional)
Sandpaper – You will need a few supplies. Sandpaper is key. Get the kind that’s designed to be used either wet or dry. Waterproof sandpaper is made for working with metal. The most common kind looks black on the working side of the sheets because of the silicon carbide grit. Sometimes it says “silicon carbide” on the back, sometimes it just says “waterproof”.
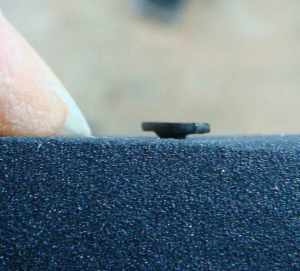
Tacks – I like carpet tacks for attaching the sandpaper. The sharp points make it easy to position them, and the heads are big enough to hold the sandpaper down well. You can use thumb tacks in a pinch, but be careful that the head of the tack isn’t wider than the edge of your strip of wood, or it can scratch your work later as you use the stick.
Wood – Finally, you need something wooden to wrap the sandpaper around. You can buy 6′- 8′ lengths of unfinished moulding at most large hardware stores. I like the rectangular stuff with one slightly rounded edge that’s simply called ‘stop’. It’s usually about 3/8″ thick and either 1.5″ wide or 1.25″ wide. You can also find moulding in quarter round (usually has no 90 degree corners), and something called ‘base shoe’ which has two 90 degree corners and a rounded profile on one edge. Most stores will cut long lengths of moulding in half for you for free, but if there’s a long line at the cutting machine, you can get an 8′ length of moulding into a regular passenger car, as long as you have no other passengers. Open the front passenger door, stand by the front wheel facing the back of the car, and feed the long stick in at an angle. Voilá! If you can’t find moulding, look for lath (often made of cedar), used for trellis and garden lattice as well as lath and plaster walls. If you can’t find either of those, look for grade stakes. These are rougher, but will work in a pinch. I know there are those of you who don’t want to hear this, but paint stirrers really will NOT work. Too thin and flexible.
Enough exposition!
Here’s what you do:
1) Mark one narrow edge of the wood with an “x”. This will be the tacked edge. 
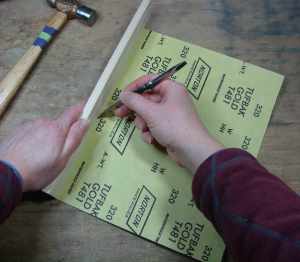
2) Align one longer edge of the sandpaper with the marked narrow edge of the wood, and gently score a fold line with your scribe, using the wood as a guide. Don’t press too hard! You don’t want to cut the paper, just make a line for a crisp fold. If you don’t have a scribe, use a ballpoint pen.
3) Fold the paper tightly around the stick, scoring lightly at each corner. 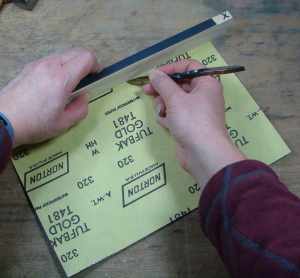
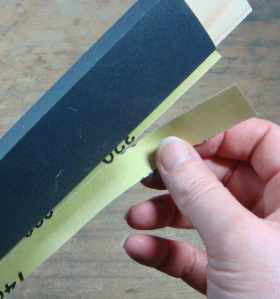
4) When you reach the edge with the “x” and there is not enough paper to go all the way around the stick again, score the fold hard several times, so that you can tear off the edge of the paper.
5) Tack the paper down, starting in the middle. If the tacks are hard to hold, use a pair of needle-nose pliers to hold them in place for the first whack of the hammer. 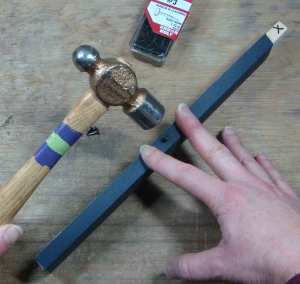

6) DON’T pound the tacks in all the way! You’ll need to be able to get them out again to replace the paper. That won’t happen for a while, though, since as one layer of paper wears out, you can tear it away to reveal a fresh layer.
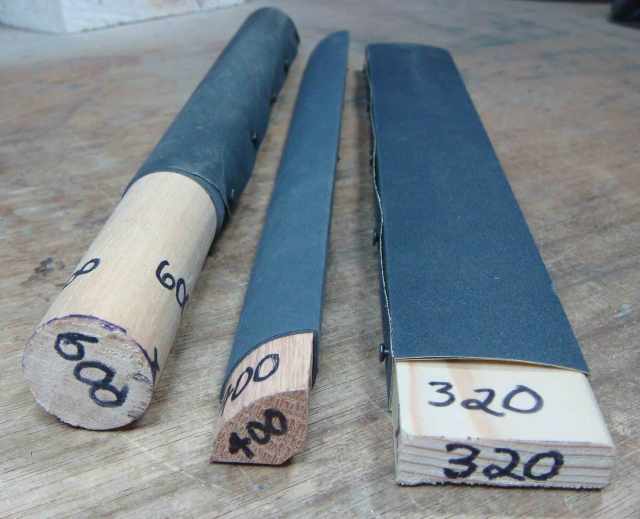
7) Mark the stick with the grit of the sandpaper. I like to mark the ends of the stick, as well as both sides.
8) Mark the leftover strip of sandpaper you tore off with the grit number. Save this strip. I’ll tell you what brilliant use to make of it in another post!
And there you have it.
Yours in moulding,
P.S. Did a friend forward this post to you? Did you stumble on it by accident? Want to eliminate the element of chance? Click here to get on my direct list.




Ji Julia, Love your blog. You have so many tricks up your sleeve and it’s so cool how generous you are with everyone.
Me again, I made these sanding sticks in your class and have made several since. I sometimes make small stamps out of modelling paste and use them to sand down the rough peaks so the stamps print better. I also use them for bookbinding and seven for smoothing my feet…how gross is that? But they work well for all kinds of things.
OOPS! Typo…I didn’t mean I use seven sanding sticks to smooth my feet…I meant to say EVEN, not Seven. Jeeze, I’m sleep deprived.
Hey Julia! Congratulations on your new site. It’s off to a great start. Your Shoebox Studio course in Red Deer last summer was filled with wonderful advice, tips and techniques … I know future posts here will be filled with lots of good things. 🙂
Even though I have made sanding sticks your detailed instructions were very useful. I am one of those people who use paint sticks but not any more! Thanks for sharing this information:)