Wooden dapping punches are useful little things to have about the jewelry studio. They are gentle tools, and won’t mark your metal the way metal punches will. To the uninitiated – and those without cabinet-making experience – they may look puzzlingly tricky to create. The truth is just the opposite, which totally enhances the fun of revealing it. I love screwing them together and having them be all “Ta-da!” awesome in about, oh, 5 minutes.
Before you can embark on those 5 minutes of blissful fun, you must gather some materials.
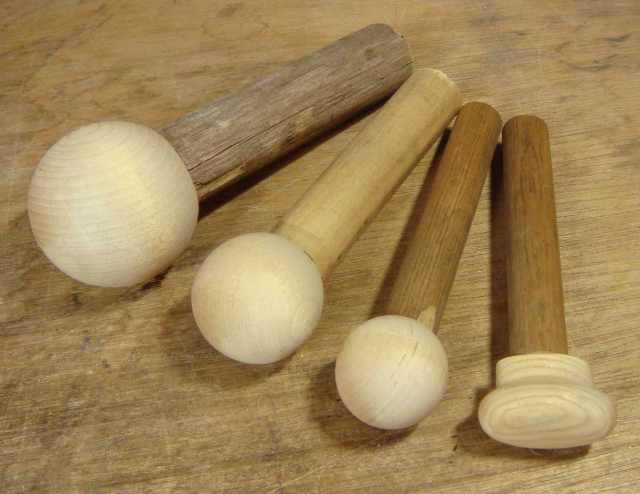
- Wooden Cabinet Knobs – These usually come in packs of 2 from the hardware store. They also usually come usefully pre-drilled and accompanied by screws, though you won’t be using those. The biggest knob in the picture is about 2″ in diameter, and the small oval one is about 1″ wide on the narrow axis.
- Wooden Dowels – I used a piece of old broom handle (about 1″ in diam.) for the biggest punch, and a scrap of 5/16″ dowel for the smallest two. I think the middle dowel was around 7/16″. Exact size isn’t important, as long as the end of the dowel is big enough to cover most of the flat part of the wood knob.
- Dowel Screws – These are the double pointed screws that you MUST have to make this project work! There are 2 sizes in the picture because the larger knobs had bigger holes than the smaller ones. Use the regular screws that come with the knobs as a gauge to determine what size diameter dowel screws you’ll need. You’ll need one dowel screw for each knob.
Assembly is pretty straight forward, but there are some tips to make it easier.
Here’s what you do:
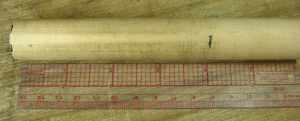
1) Mark a length of about 4″ on your dowel. It’s a good idea to make a ring of marks around the dowel, so that you can cut it off as evenly as possible. (I didn’t make a ring of marks on the pictured dowel, but let’s just pretend I did…)
2) Cut your dowel. I used a hack saw, but you can use whatever saw you have on hand, including a jeweler’s saw. If you use a jeweler’s saw, use a big blade, like a #4, or you’ll be there cutting all day. Try to keep the saw perpendicular to the dowel, so that the cut end of the dowel will be as flat as possible. This is where the ring of marks comes in handy, as cutting along them helps keep your cut perpendicular. If you can stand the cut dowel on end, that’s a good sign that the end is fairly level.
3) Place the dowel in a vise and use a pencil compass or a pair of dividers to find the center. Rest one leg of the compass or dividers against the side of the dowel, open the compass to what you estimate is about half the diameter of the dowel, and scribe an arc across the flat cut face. Move the compass to at least 2 more spots around the circumference of the dowel and make a new arc each time. The arcs will show you where the center is. Use a center punch to make a divot at the center mark where you will drill your hole.
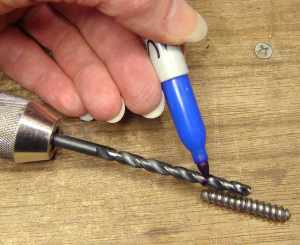
4) Select a drill bit that will fit into the existing hole in the wooden knob. This is the size hole you’ll want to drill in the end of your dowel to receive the other end of the dowel screw. Test the depth of the hole in your wooden knob with a bit of wire, and use this measurement to figure out how much of the dowel screw needs to sink into the dowel. You’ll need to drill a hole that deep in the dowel, so mark that depth on your drill bit.
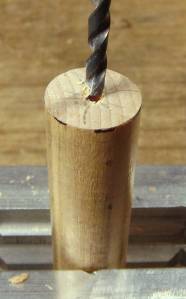
5) Carefully drill a hole in the end of your dowel. I used a hand drill so that I could go slowly and keep an eye on the mark on the drill bit. Naturally, you’ll be careful to drill the hole straight.
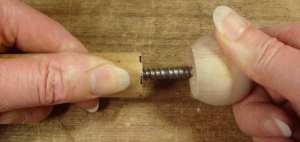
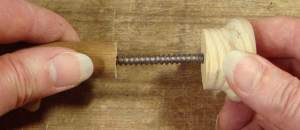
6) This is the moment you’ve been waiting for! Push the dowel screw into the holes in both the dowel and the knob, and screw on both wooden pieces at the SAME time. The parts will screw together tightly, completely covering the screw. Feels like magic ;).
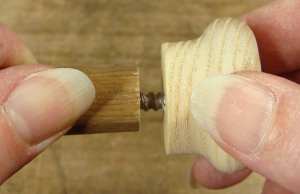
This part is delicious, so I had to put in another set of pictures – in case you didn’t get a good taste the first time!
See? Nice and tight.
And that’s it! Now all you need is a hammer, and some metal to form. There are all sorts of options for what to press the metal down into. You can use a classic metal or wood dapping block, work on a sand bag, create a depression in thermoplastic, or come up with myriad other enticing solutions.
Go forth and wring some juice out of your chosen depression!
xo,
P.S. Did a friend forward this post to you? Did you stumble on it by accident? Want to eliminate the element of chance? Click here to get on my direct list.









Pure genius!!
Thanks Julia! I love making my own things like this.
Love it! Especially the juice part!
Absolutely brilliant !! I’m going to be making these-thanks so much !!!
OMG YOU soooo are the GENIUS I knew you were and more!!!!! I cannot wait to make theses. I don’t have any and have been looking at them and with everything I am already spending… well this woman whose lives in this shoe is on a shoestring budget and so this shoebox stuff is EXACTLY what I need your mind must just keep going and going. THANK YOU THANK YOU THANK YOU you never cease to enlighten me !!! xoxo
I was thinking if his could not also be made using one of those wooden dowels for woodconnections. I have no idea here to get these metal screw things here in Holland
Hi Ellis, I think you could probably use wooden dowels to connect the parts, since the force of the blows on the punch is going to be traveling along the dowel connection (rather than across it, which might break it). You might ask at a hardware store about the dowel screws first, though. They are the sort of thing that can easily be over-looked even if you are actively looking for them :).
Thank you Julia. I will make a print out and head for the shop. Got to make these!
muy buena idea gracias
‘Drawer pulls’ are those little handles for drawers, they come in rounds, ovals and odd shapes, the solid brass ones are very strong. Epoxy + screw to dowel and/or sleeve the join with any metal tubing that will fit with plenty of epoxy, then whack metal with abandon! You can also carve random blocks of hardwood (edge grain better) to make a custom dapping die to match your new dap, standard woodworking tools or flexshaft grinding bit will do fine.
Can’t find “dowel screws”? Grind rough tapers on standard threaded rod sections, takes a minute or two each, cheap and simple.
Hi Julia, I just found your site through Pintrest. As a very amateur jeweller based in Australia, it’s great to find sites like yours full of useful, cheap DIY tools. So thanks a million for your labour and learning and getting these tips out to us all.
You are just exactly who I am writing for! Welcome to the Shoebox Studio family :).